Handmade beaded suncatchers bring natural light to life by scattering vibrant color patterns and crystal reflections across your living space. Crafting your own window ornaments is a rewarding, budget-friendly DIY activity suitable for crafters of all skill levels. By combining quality glass beads, faceted prisms, sturdy wire, and repurposed items, you can create custom hanging decor tailored to any aesthetic.
Explore these 13 creative DIY beaded suncatcher ideas, complete with material lists, practical assembly instructions, and helpful crafting tips to ensure durable, beautifully balanced results.
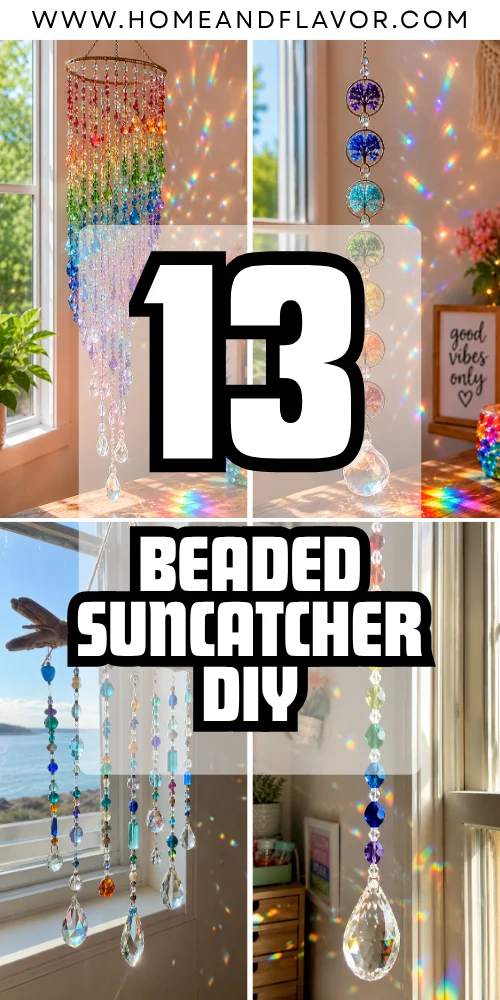
1. Rainbow Crystal Beaded Suncatcher
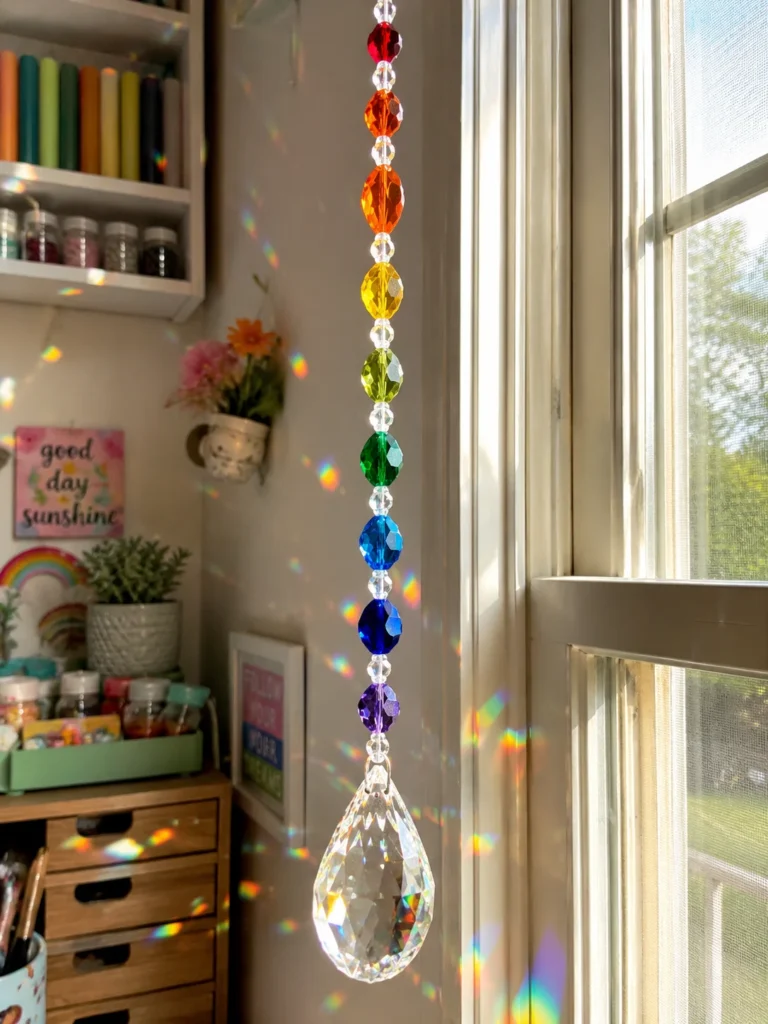
This classic linear suncatcher stacks vibrant colored beads above a heavy faceted crystal drop. Arranging beads in a balanced spectral gradient ensures a steady, straight hang while projecting bright rainbow patterns across the room.
Design Overview
A single vertical strand featuring graduated rainbow glass beads anchored by a cut-glass or crystal prism.
Recommended For You



Supplies & Estimated Budget
- Beading wire (49-strand coated steel recommended)
- Assorted transparent glass beads in rainbow hues
- Faceted crystal prism pendant
- Crimp beads and crimping pliers
- Top hanging split ring
Estimated Cost: $8–$15
Step-by-Step Instructions
- Cut a 12- to 16-inch length of beading wire.
- Thread a crimp bead and loop the wire through your crystal prism, passing the tail back through the crimp bead before flattening it securely.
- String the glass beads in sequential spectral order (red, orange, yellow, green, blue, violet).
- Attach a top hanging ring using a second crimp bead to create a secure hanging loop.
Pro Crafting Tip
Avoid placing lightweight acrylic beads near the bottom of the strand. Heavier glass or crystal elements provide the tension needed to keep the wire straight and prevent twisting.
2. Heart-Shaped Beaded Suncatcher
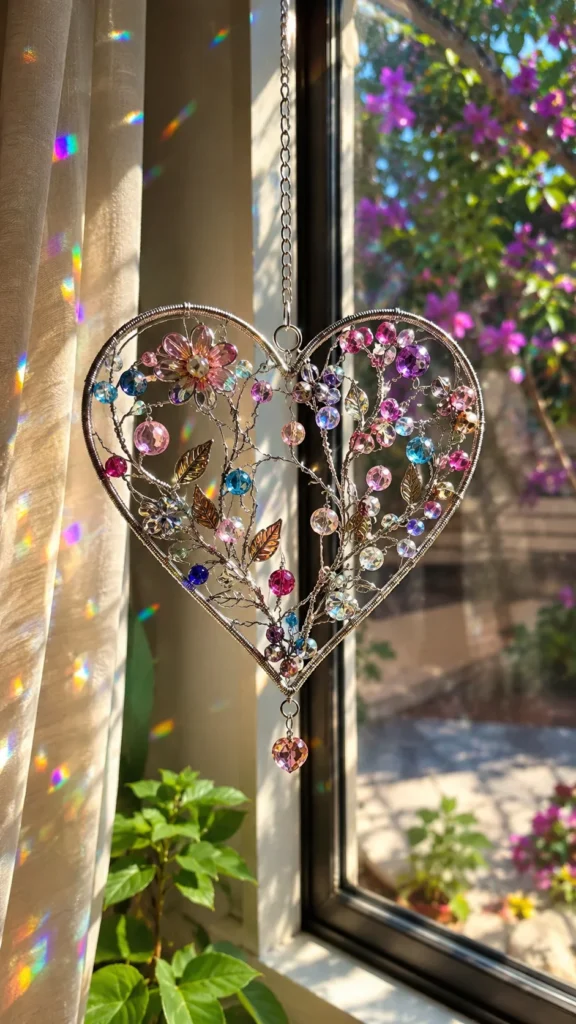
A structured wire heart frame wrapped with shimmering beads forms a romantic window accent. Using a firm base wire ensures the frame keeps its shape under the weight of decorative beads and dangling prism drops.
Design Overview
A shaped wire silhouette accented with perimeter bead wrapping and a centered suspended crystal.
Supplies & Estimated Budget
- 16-gauge or 18-gauge craft wire (for the frame)
- 24-gauge or 26-gauge binding wire
- Glass seed beads and bicone crystals
- Round-nose pliers and wire cutters
- Ribbon or chain for hanging
Estimated Cost: $10–$18
Step-by-Step Instructions
- Bend the heavy-gauge wire into a symmetrical heart shape, twisting the top ends together to lock the form.
- Anchor fine-gauge wire to one side of the frame and begin wrapping, threading beads onto each pass around the perimeter.
- Create a central vertical drop by stringing beads and a small crystal pendant down the middle of the heart.
- Fasten a sturdy ribbon or metal loop to the top junction.
Pro Crafting Tip
Draw a heart template on paper first. Lay your heavy wire directly over the sketch while bending to ensure clean symmetry and smooth curves.
3. Driftwood and Bead Suncatcher
Combining the organic texture of weathered driftwood with high-clarity glass beads creates a grounded, bohemian look. The horizontal wood base allows you to suspend multiple strands at staggered lengths.
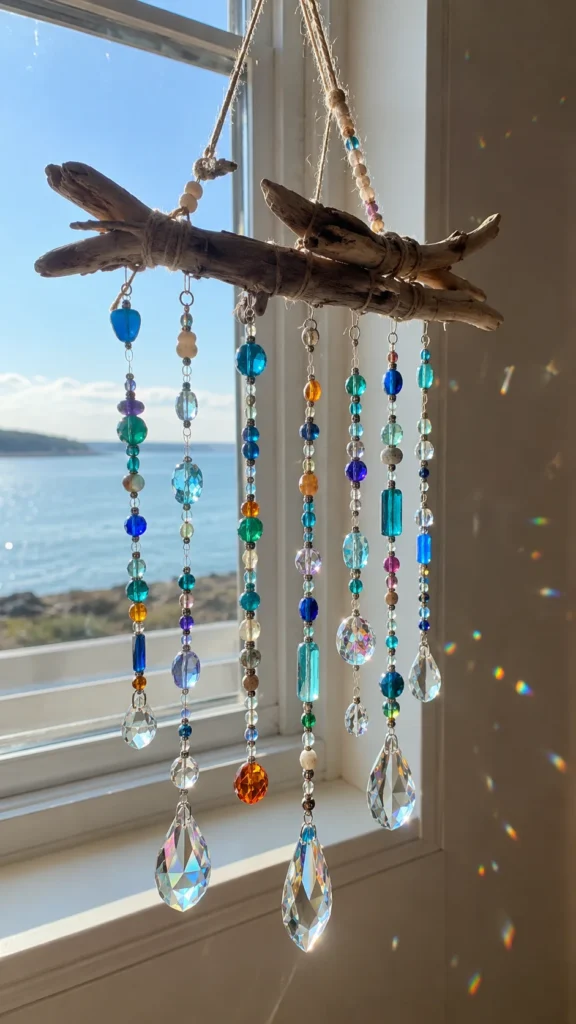
Design Overview
A multi-strand hanging mobile anchored to a natural wood branch or driftwood piece.
Supplies & Estimated Budget
- Piece of dried driftwood (6–10 inches long)
- Clear monofilament or flexible beading wire
- Assorted glass beads, wooden beads, and crystal droplets
- Small eye screws
- Hanging twine or cord
Estimated Cost: $5–$15
Step-by-Step Instructions
- Clean and thoroughly dry the driftwood branch.
- Install 3 to 5 evenly spaced eye screws along the bottom edge of the wood.
- Thread beads onto separate strands of wire, varying the lengths to form a cascading or V-shaped profile.
- Attach crystal drops to the ends of each strand and secure the top of each wire to an eye screw.
- Tie hanging cord to both ends of the branch for balanced wall or window suspension.
Pro Crafting Tip
If using natural foraged driftwood, seal it with a light coat of clear matte acrylic spray to prevent flaking and moisture degradation over time.
4. Flower-Shaped Beaded Suncatcher
This floral design features looped wire petals loaded with colorful glass beads radiating from a central prism. It adds a cheerful garden theme to sunny kitchen or sunroom windows.
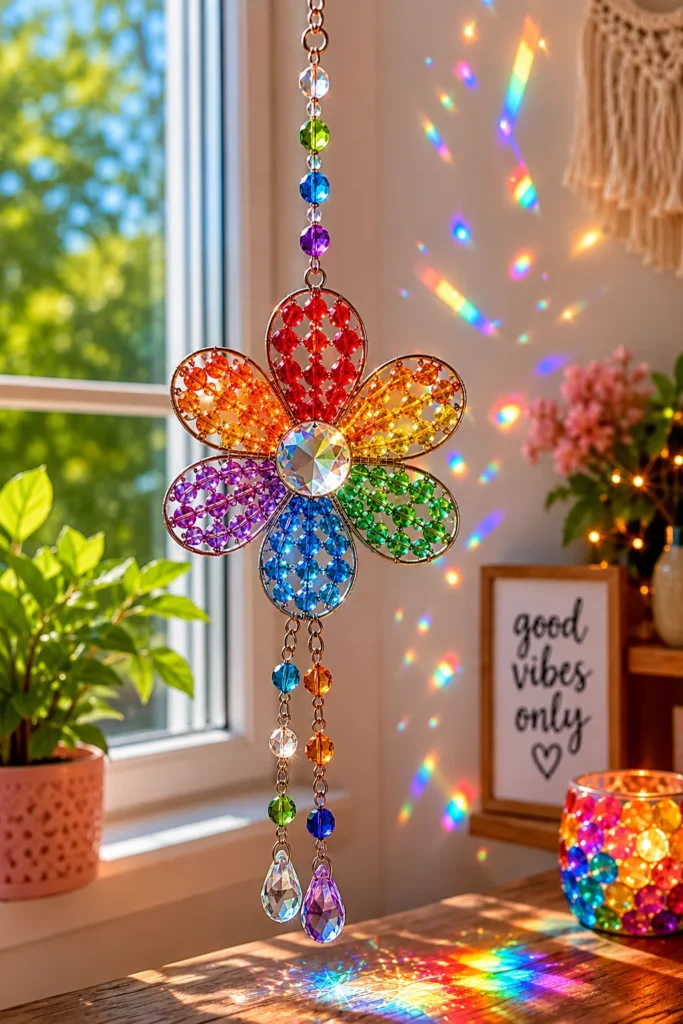
Design Overview
A symmetrical wire flower consisting of individually beaded petal loops joined around a decorative central bead.
Supplies & Estimated Budget
- 20-gauge floral or craft wire
- Uniformly sized glass beads (6mm or 8mm)
- One large focal crystal or faceted bead (12mm–16mm)
- Needle-nose pliers
Estimated Cost: $8–$16
Step-by-Step Instructions
- Cut 5 to 6 equal wire lengths to form your individual petal segments.
- String an identical count of beads onto each segment, bending each wire into an oval loop and twisting the base ends together.
- Join all petal bases tightly around a central core wire.
- Thread the large focal crystal over the center to conceal the wire joins, securing the ends at the back.
- Form a top hanging loop on the upper petal.
Pro Crafting Tip
Count your beads carefully for each petal prior to assembly. Using identical bead counts and sizes is essential for keeping the flower symmetrical.
5. Hanging Sunburst Suncatcher
Inspired by sun rays, this geometric project uses a central metal ring with radiating beaded wire spokes. It captures incoming sunlight from multiple angles simultaneously.
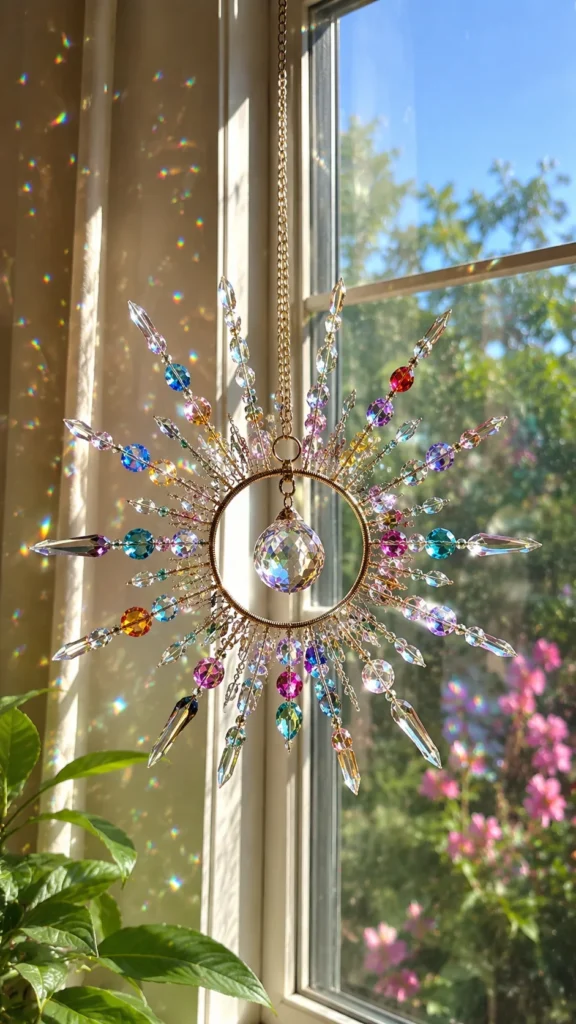
Design Overview
A circular metal frame with alternating long and short beaded wire rays extending outward.
Supplies & Estimated Budget
- Small brass or steel hoop (2–3 inches in diameter)
- 20-gauge half-hard craft wire
- Yellow, amber, clear, and iridescent crystal beads
- Wire cutters and flat-nose pliers
Estimated Cost: $12–$20
Step-by-Step Instructions
- Cut 8 to 12 pieces of wire for the rays, alternating between 3-inch and 4.5-inch lengths.
- Secure the inner end of each wire spoke tightly around the central metal hoop.
- Thread crystals onto each spoke, securing the outer tip by creating a small closed wire loop with round-nose pliers.
- Suspend a crystal teardrop inside the open center of the hoop for extra refraction.
Pro Crafting Tip
Vary the facet cuts and diameters of the beads along each ray to create visual depth and maximize light scattering.
6. Vintage Button and Bead Suncatcher
Mixing heirloom buttons with faceted glass beads adds rich vintage charm and tactile variety. The blend of mother-of-pearl, carved metal, and colorful glass creates an eye-catching eclectic style.
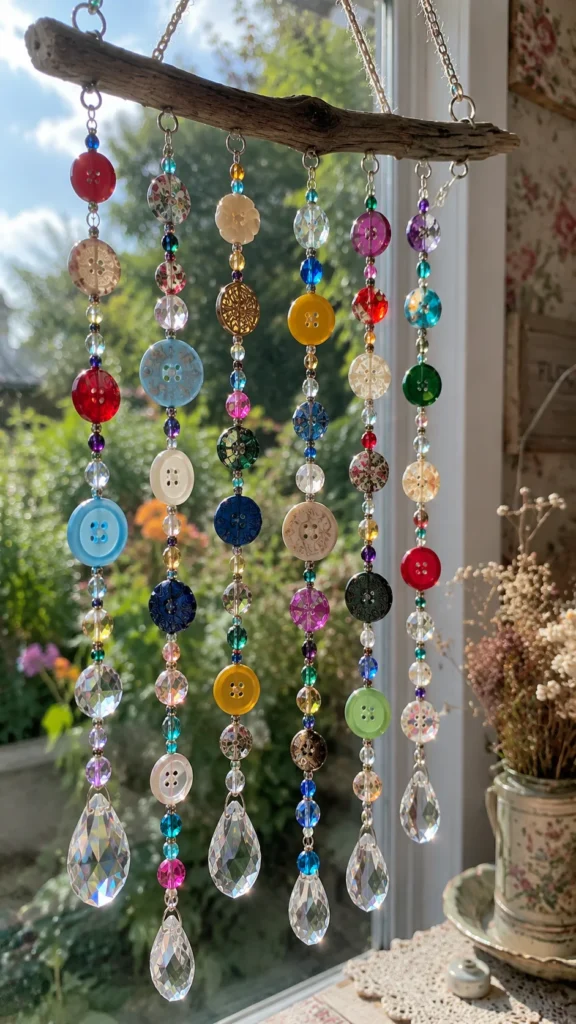
Design Overview
Cascading vertical strands that combine vintage shank or flat buttons with reflective spacer beads.
Supplies & Estimated Budget
- Assorted vintage buttons (acrylic, glass, or mother-of-pearl)
- Glass spacer beads and crystal bicones
- Beading wire and crimp beads
- Small chandelier drop or prism
Estimated Cost: $5–$12
Step-by-Step Instructions
- Sort buttons by size, placing larger buttons near the center and smaller ones along the top.
- Thread buttons onto the wire, placing small glass spacer beads between them to keep the buttons lying flat.
- Add a faceted glass prism at the bottom of the strand for light refraction.
- Crimp the top into a closed hanging loop.
Pro Crafting Tip
Stick to a unified color palette (such as warm amber, soft pastels, or cool blues) to keep the varied button shapes looking cohesive rather than cluttered.
7. Mason Jar Lid Beaded Suncatcher
Upcycling the screw band of a two-piece mason jar lid provides an inexpensive circular frame for suspended bead weaving. It is an approachable, kid-friendly upcycling craft.
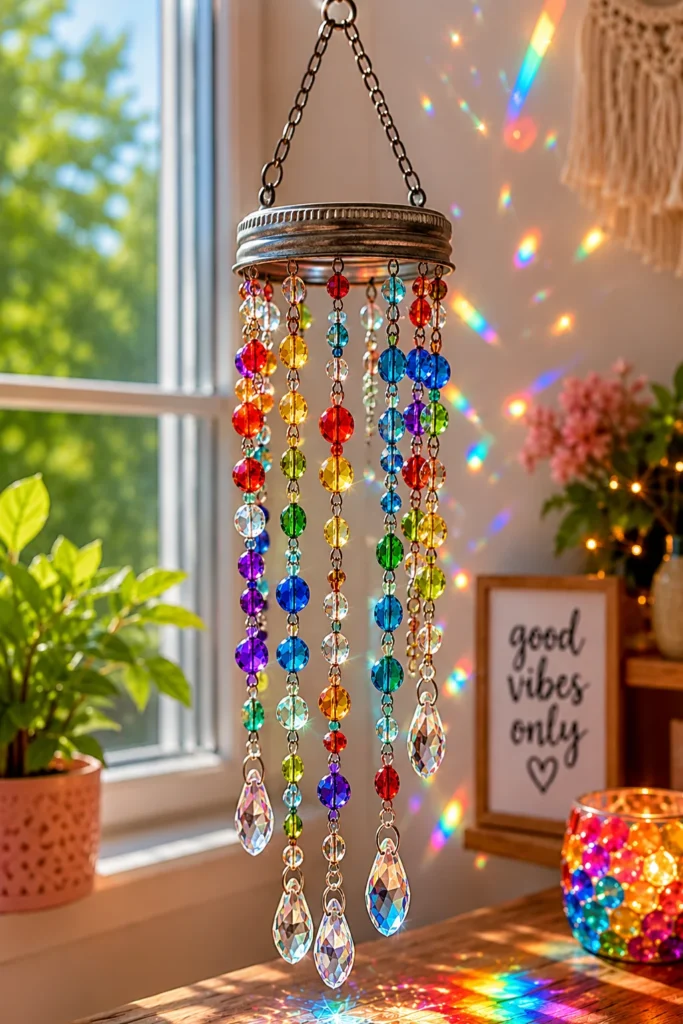
Design Overview
A metal canning ring wrapped with wire and filled with an internal web or vertical strands of colorful beads.
Supplies & Estimated Budget
- Standard or wide-mouth mason jar metal ring
- 22-gauge craft wire
- Pony beads, glass beads, or crystal chips
- Jute twine or craft ribbon
Estimated Cost: $4–$10
Step-by-Step Instructions
- Inspect the metal ring and smooth any rough edges using fine sandpaper.
- Anchor wire to the top of the ring and begin stretching strands across the inner opening, threading beads as you cross the circle.
- Wrap the wire firmly around the rim after each pass to maintain tension.
- Add a few short beaded drops hanging from the bottom of the ring.
- Tie a loop of jute twine around the top of the ring for hanging.
Pro Crafting Tip
Paint the metal jar ring with rust-preventative outdoor spray paint before adding wire if you plan to hang the suncatcher in high-humidity areas like a kitchen or porch.
8. Spiral Beaded Suncatcher
Shaped from springy memory wire or hand-coiled heavy wire, this vertical spiral creates dynamic movement. Even light indoor air currents cause the spiral to gently spin, producing shimmering patterns.
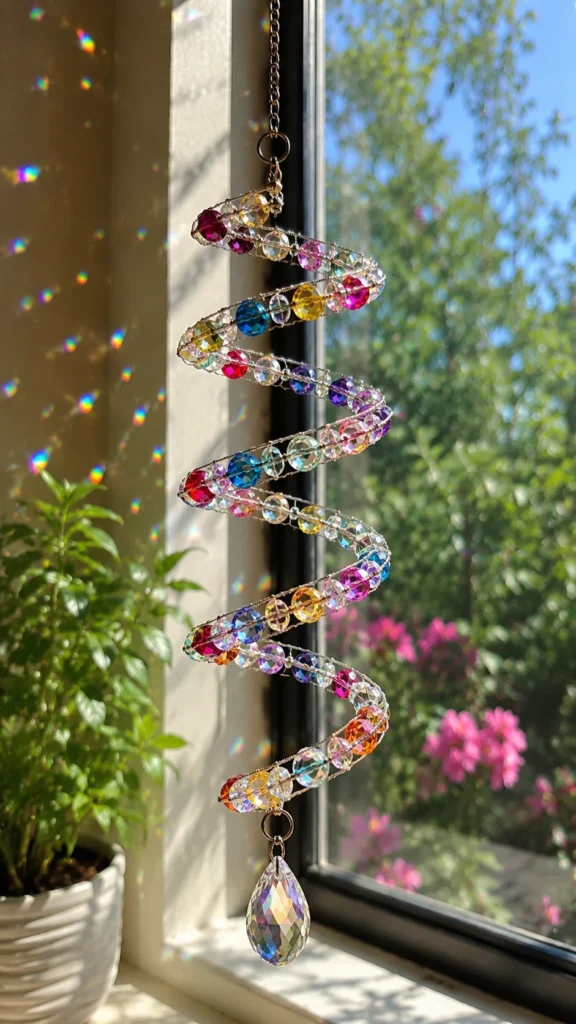
Design Overview
A descending helical wire coil loaded with beads that rotates freely in gentle breezes.
Supplies & Estimated Budget
- Heavy-gauge bracelet memory wire or 18-gauge copper wire
- Graduated glass crystal beads (4mm to 10mm)
- Ball-end headpins or heavy pendant drop
- Memory wire shears and round-nose pliers
- Swivel hook (fishing swivel or spinner clip)
Estimated Cost: $8–$15
Step-by-Step Instructions
- Using a cylindrical object (like a wooden dowel or bottle), coil your wire into a continuous downward helix.
- Create a small closed loop at the bottom end of the wire.
- Thread beads along the entire length of the coiled spiral.
- Attach a heavy crystal pendant at the bottom loop to maintain vertical tension.
- Fasten a ball-bearing swivel hook to the top loop so the piece can rotate without binding the hanging line.
Pro Crafting Tip
Always use dedicated memory wire cutters rather than standard craft pliers when working with tempered steel memory wire to avoid damaging your tools.
9. Butterfly Beaded Suncatcher
This nature-inspired design shapes wire into symmetrical upper and lower butterfly wings filled with delicate beads. It makes a beautiful decorative piece for spring and summer window displays.
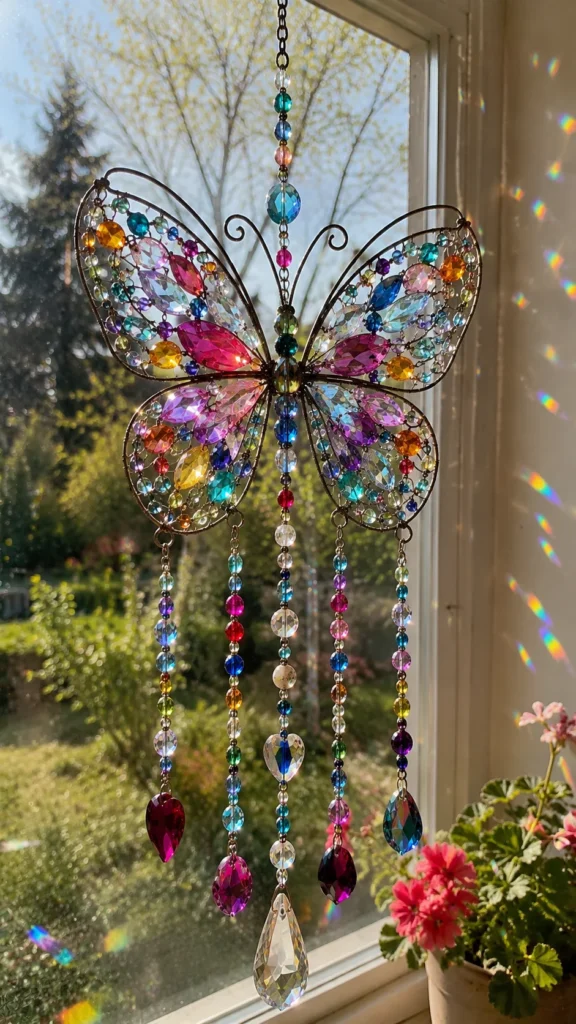
Design Overview
A dual-winged wire silhouette with fine-wire beaded lattice infill and antenna accents.
Supplies & Estimated Budget
- 18-gauge wire (frame) and 26-gauge wire (weaving)
- Translucent seed beads and crystal rondelles
- Long teardrop crystal (for the butterfly body)
- Chain-nose and round-nose pliers
Estimated Cost: $10–$18
Step-by-Step Instructions
- Bend a continuous piece of 18-gauge wire into butterfly wings, creating symmetrical top and bottom loops on both sides.
- Form the central body using a long faceted teardrop bead mounted on a central wire stem.
- Weave fine 26-gauge wire across the open wing frames, stringing small seed beads across the openings.
- Twist the top wire ends into curled antennae and attach a clear hanging line to the center balance point.
Pro Crafting Tip
Assemble and bead one entire side first, then reference it bead-by-bead while building the opposite wing to maintain exact symmetry.
10. Chakra-Inspired Beaded Suncatcher
Organized into seven distinct color tiers, this linear suncatcher represents the traditional chakra spectrum: red, orange, yellow, green, blue, indigo, and violet. It delivers an orderly, vibrant display that catches direct sunlight brilliantly.
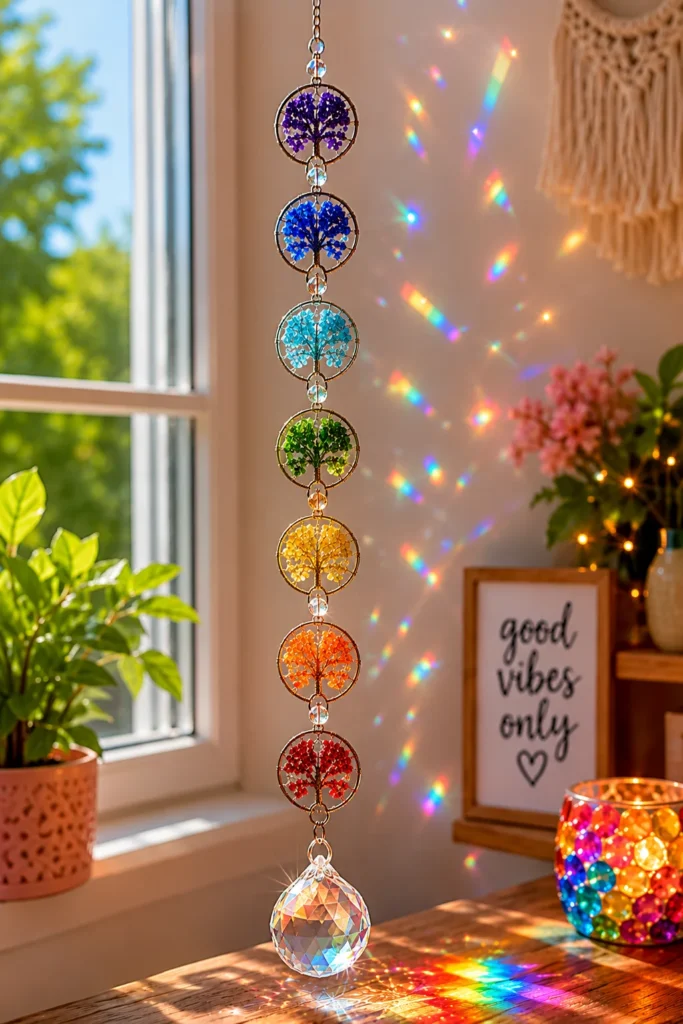
Design Overview
A sleek, vertical alignment of seven distinct color groupings separated by metallic spacer accents and finished with a clear crystal sphere.
Supplies & Estimated Budget
- Faceted crystal beads in red, orange, yellow, green, light blue, dark blue, and purple
- Metallic spacer beads or rondelles
- 40mm clear faceted crystal sphere
- Nylon-coated steel beading wire and crimp tubes
Estimated Cost: $8–$14
Step-by-Step Instructions
- Lay out your beads on a bead board in clean color groups separated by metallic spacers.
- Thread the crystal sphere onto your wire, anchoring it with a secure crimp tube.
- String the beads upward through the spectrum, starting with red at the bottom and finishing with violet at the top.
- Add a crimp tube at the top to form a secure loop for hanging.
Pro Crafting Tip
Use clear crystal spacers or silver-plated rondelles between each color block. This visual separation helps each individual color band stand out in bright sunlight.
11. Sea Glass and Bead Suncatcher
Naturally frosted sea glass diffuses light into soft, pastel glows rather than sharp points of reflection. Paired with polished glass crystal beads, it creates a serene coastal aesthetic.
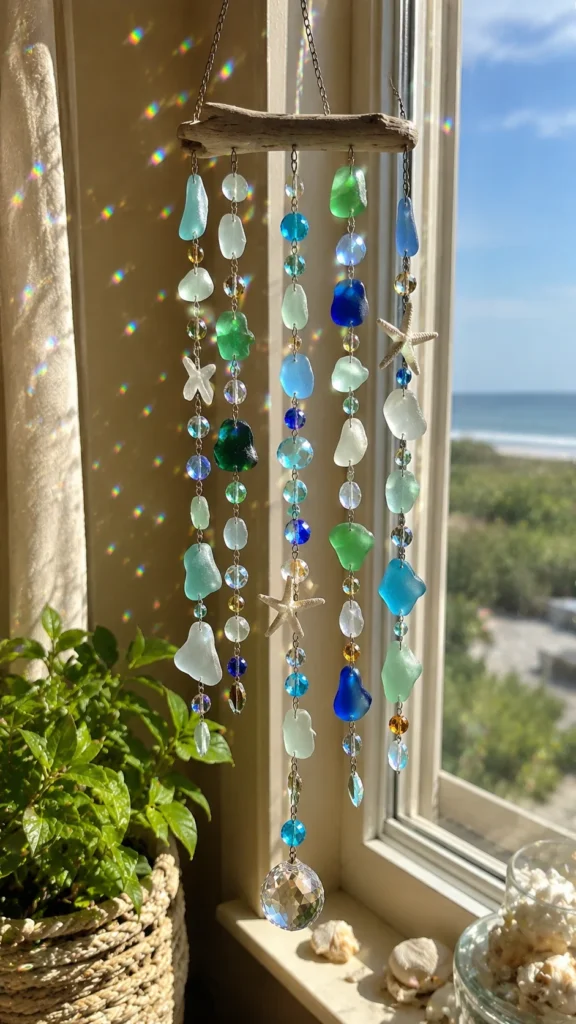
Design Overview
A hanging strand featuring wire-wrapped or drilled authentic sea glass accented with sparkling glass beads.
Supplies & Estimated Budget
- Pre-drilled or wire-wrapped sea glass pieces (aqua, green, white)
- 22-gauge tarnish-resistant craft wire
- Small glass beads and crystal accents
- Hanging ring
Estimated Cost: $10–$20
Step-by-Step Instructions
- If sea glass is undrilled, wrap each piece securely in a cage-style wire wrap, finishing with top and bottom eye loops.
- Link the wrapped sea glass pieces together using jump rings or short segments of beaded wire.
- Intersperse small crystal beads between the sea glass segments for added sparkle.
- Attach a sturdy hanging ring to the top link.
Pro Crafting Tip
Avoid drilling sea glass without specialized diamond-tipped drill bits and continuous water submersion. Cage wrapping with wire is often faster, easier, and protects the glass from breaking.
12. Beaded Moon and Stars Suncatcher
Celestial motifs bring a timeless, whimsical look to window decor. A crescent moon wire frame filled with beads and accented with dangling stars creates an elegant, layered focal point.
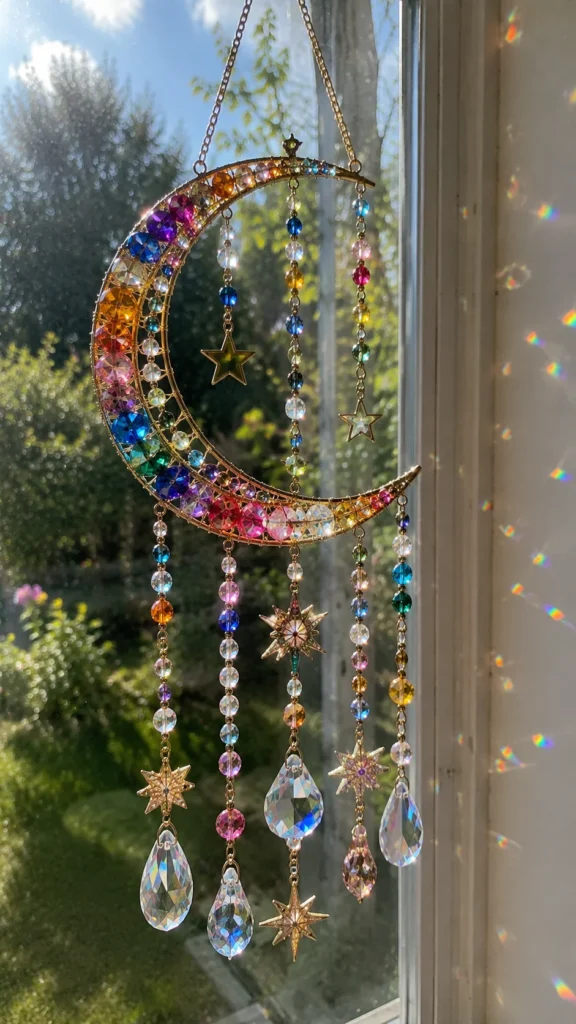
Design Overview
A crescent moon silhouette decorated with blue, clear, and iridescent beads, completed with suspended star pendants.
Supplies & Estimated Budget
- Pre-formed metal crescent moon frame or heavy wire
- Star-shaped glass charms or crystal pendants
- Clear, iridescent, and sapphire-blue glass beads
- 24-gauge craft wire
Estimated Cost: $10–$18
Step-by-Step Instructions
- Anchor fine wire to the crescent moon frame and wrap beads around the outer and inner contours.
- Suspend 2 to 3 short beaded strands from the bottom curve of the crescent.
- Attach star-shaped crystal pendants to the ends of the dangling strands at staggered heights.
- Add a top hanging loop to the center-top balance point of the moon.
Pro Crafting Tip
Test the balance of your moon frame by holding it loosely by the hanging loop before tightening wire connections. This ensures it hangs straight rather than tilting forward or backward.
13. Layered Crystal Waterfall Suncatcher
This multi-tiered chandelier design features cascading strands of crystal prisms suspended from a circular base. It catches maximum sunlight, filling large rooms with brilliant light refractions.
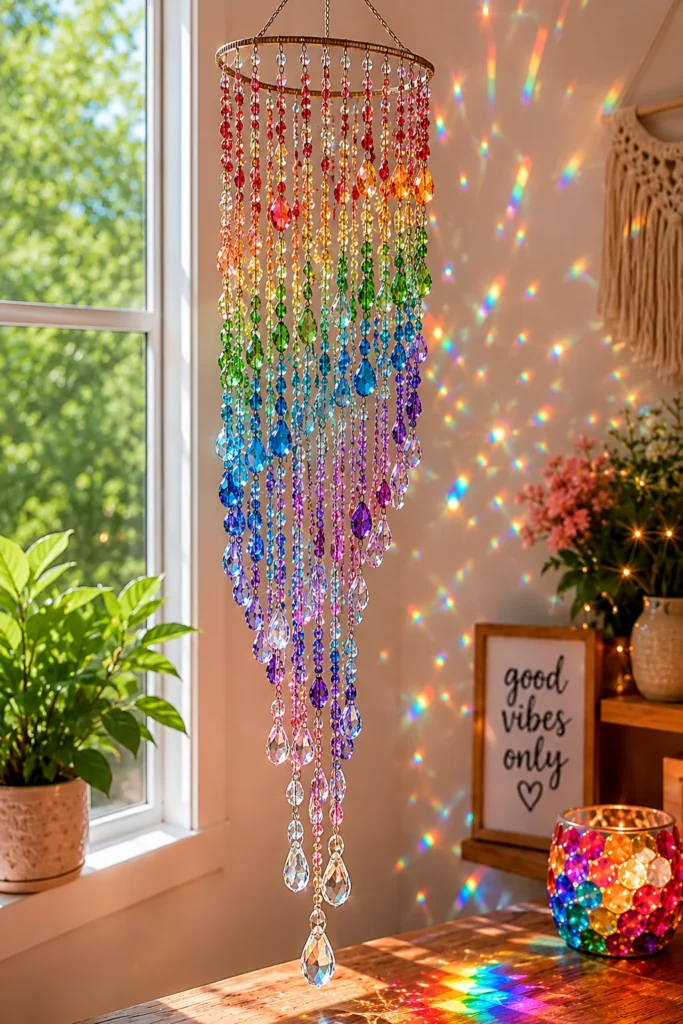
Design Overview
A multi-strand cascading chandelier that steps down in length from outer rim to center.
Supplies & Estimated Budget
- 3-inch or 4-inch metal craft hoop or chandelier ring
- Faceted crystal octagon prisms and teardrop pendants
- Nylon-coated steel beading wire and crimp beads
- Jump rings and hanging chain
Estimated Cost: $15–$30
Step-by-Step Instructions
- Cut 6 to 8 wire strands in graduated lengths (e.g., 4 inches, 6 inches, and 8 inches).
- Thread crystal octagons and bicones along each strand, finishing each end with a teardrop crystal prism.
- Attach the strands around the perimeter of the hoop at equal intervals, placing longer strands in the center or back for a tiered effect.
- Connect a 3-way chain harness to the top of the ring to ensure level, stable hanging.
Pro Crafting Tip
Hang the central hoop from a temporary hook while attaching strands. Working on the suncatcher while it hangs helps you verify spacing, symmetry, and level balance in real time.
Frequently Asked Questions
What type of beads work best for DIY suncatchers?
Faceted glass beads, K9 crystal glass, and Swarovski crystals work best because their high clarity and sharp facets maximize light refraction into bright rainbows. While acrylic and plastic beads are lightweight and budget-friendly, they tend to dull over time and diffuse rather than refract direct sunlight.
Should I use fishing line or beading wire for suncatchers?
Nylon-coated 49-strand stainless steel beading wire is the best choice for longevity. It resists UV degradation, will not become brittle from direct window heat, and holds crimp beads securely. Monofilament nylon fishing line works for lightweight projects but can degrade and snap after prolonged sun exposure.
Which window orientation provides the best light for suncatchers?
South-facing windows offer the longest exposure to direct, high-angle sunlight throughout the day. East-facing windows produce vibrant morning light, while west-facing windows generate long, dramatic rainbow patterns during the late afternoon and sunset.
How do I prevent multi-strand suncatchers from tangling?
Use heavy crystal drops at the bottom of each strand to keep the lines taut. Maintain at least one inch of spacing between attachment points on the top hoop, and hang the piece away from direct paths of indoor HVAC vents or open doorways that cause turbulent airflow.
How do you clean dust and film off a beaded suncatcher?
Gently dust the strands with a dry microfiber cloth or soft makeup brush. To remove window films or residue, wipe the crystal and glass components with a lint-free cloth dampened with distilled water and a drop of isopropyl alcohol, then dry immediately to prevent water spots.